Roof leak repair may involve finding and repairing areas of a roof where water has penetrated. Even a minor leak could lead to mold or costly structural damage if ignored. Aging materials, failed shingles, and overflowing gutters can all contribute to these leaks, making it imperative to repair them as soon as possible.
Addressing these issues promptly helps protect your home from further harm and saves money on extensive repairs down the line. Roof leak repair procedures usually consist of filling leaks with a permanent material, changing damaged shingles or tiles, or using a weather-resistant sealant on roof seams.
For homeowners, knowing the common causes and practical solutions ensures a safer, longer-lasting roof. In today’s comprehensive guide, we’ll explore the step-by-step process, expert tips, and industry tools you need to know for successful roof leak repair.
Key Takeaways
-
Spot early signs of roof leaks by checking for water stains, discoloration, peeling paint, or drips during rain, and address issues promptly.
-
Regularly inspect your attic for moisture, mold, or damp insulation, and examine the roof exterior for damaged shingles, granule loss, or flashing issues.
-
Know that some of the most frequent culprits for leaks involve old materials, storm destruction, bad installation practices, debris accumulation, and seasonal weather conditions.
-
Inspect major problem areas such as chimneys, plumbing vents, roof valleys, skylights, and pipe collars. These areas may be concealing leak sources just waiting to surprise you.
-
Consider consulting roofing professionals for complex repairs, safety concerns, or long-term solutions to save on recurring costs and extend roof life.
-
Avoid future leaks by cleaning your gutters, cutting back trees that hang over your roof, properly ventilating your attic, and scheduling roof inspections every few years.
Spotting Early Signs of Roof Leaks
While a roof leak can do some pretty serious damage if ignored, catching one early on will save you time and money on expensive repairs. By familiarizing yourself with the signs to watch for, you can spot and solve problems before they become a larger, more expensive issue.
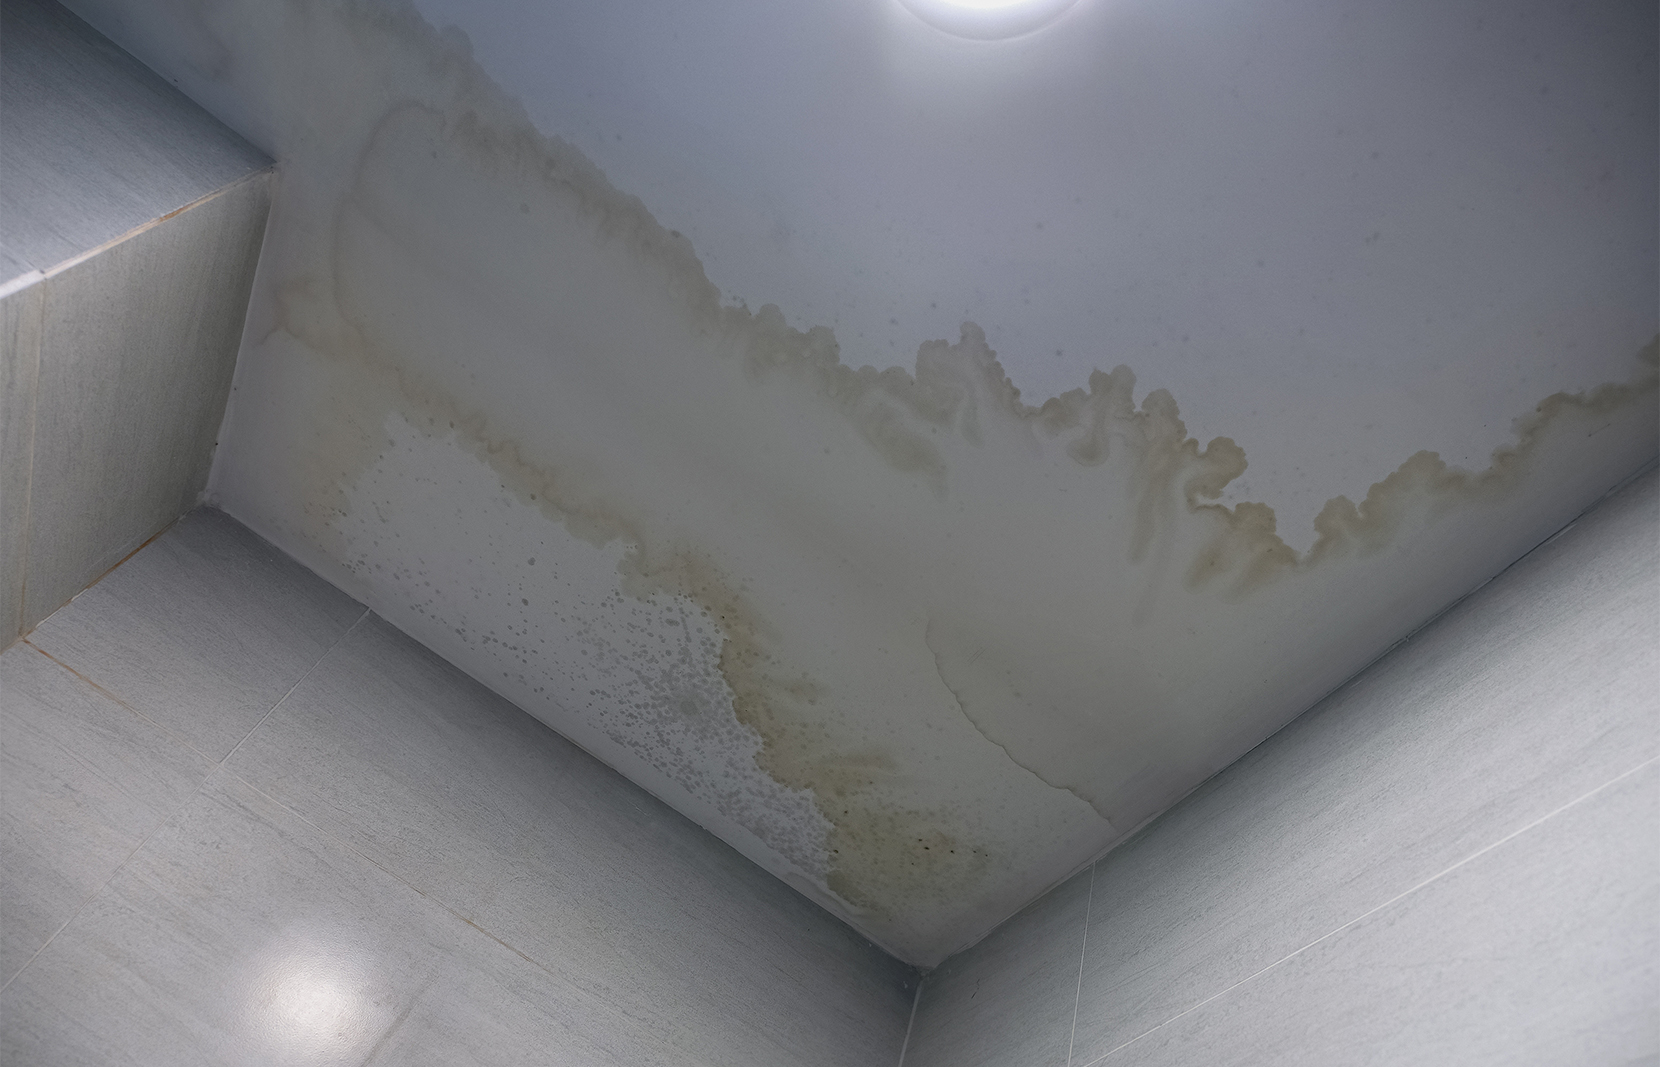
Look for Interior Water Stains
The most obvious warning sign of a roof leak is usually water stains that show up on ceilings or walls. Initially, these stains may present themselves as brown or yellow tinged discoloration, usually with very uneven jagged edges.
If these stains expand or get darker following a heavy rain, this is a sign that you have an active leak. Examine the surfaces directly above the visible stains, as this is typically where you’ll most likely spot the source of the leak.
Check the Attic for Moisture
Your attic is one of the most important areas to check when spotting roof leaks. Inspect the roof decking for water spots or streaks and check for mold growth or musty odors, which indicate lingering moisture.
Damp insulation is another clear indicator, as insulation will soak up moisture from leaks. Inspect the rafters from underneath, paying special attention to areas where roof planes meet.
Watch out for missed nails, or “shiners,” which can create condensation that drips onto the roof. Regular attic checks can prevent widespread damage and save you from costly repairs.
Examine Exterior for Damaged Shingles
Homeowners should know that damaged shingles are one of the most common leak culprits. Check for any cracks, curled up edges, missing sections, or a loss of granules that are leaving the base material exposed.
Moss or algae growth can weaken shingles, causing them to leak over time. Check around flashing, vent pipe bases, or chimney bases for cracks or missing materials.
Even the smallest nail hole from one-off installations, such as solar panels or Christmas decorations, can provide an access point for water to enter unnoticed.
What Causes Roof Leaks?
Roof leaks can be caused by a variety of issues, some more common than others. Only through understanding these causes can you detect and repair them in a timely manner to avoid the needlessly costly damages they can incur.
1. Age of Roofing Materials

Like everything in life, roofing materials will wear down over time—especially materials that are at or past their expected lifespan. As an example, asphalt shingles usually last around 20–25 years, but prolonged exposure to UV rays, wind, and moisture significantly increases their deterioration.
Signs of aging are curling, cracking, or missing shingles. Neoprene seals around vents will crack from long-term UV exposure, creating an entry point for water. If your roof is largely worn out, it may be more cost efficient long term to get a new roof instead of doing continuous repairs.
2. Storm Damage Impact
Severe thunderstorms with high amounts of rain, wind, or hail can easily loosen up shingles or erode roof flashing, making roofs more susceptible to leaks. Roof valleys, the areas on your roof where water naturally runs together, are especially prone to leak after a big storm.
Taking the time to inspect your roof right after a storm passes through is essential for identifying problems as soon as possible. Taking time to document storm damage will ensure you are well prepared for any potential insurance claims.
3. Improper Installation Issues
Forgetting or poorly installing aspects, such as misaligned shingles or bad flashing placement, commonly results in leaks. Loose or missing flashing around chimneys and vents can allow water to seep through ceilings or walls.
Having qualified professionals install roofs and carefully reviewing warranties can greatly reduce these risks.
4. Debris Accumulation Problems
Leaves, moss and branches that collect on your roof trap moisture, which can cause water to pool and eventually leak. Periodic cleaning of gutters and roof valleys improves drainage and keeps moisture from accumulating.
5. Seasonal Weather Effects
Winter ice dams and spring rains pile up on these vulnerabilities. Adjusting maintenance routines seasonally ensures prolonged roof life.
Common Roof Leak Locations
By knowing the most frequent roof leak locations, you’ll be more attuned to issues before they start. Roof penetrations, like chimneys, vents, and skylights, are common offenders as these penetrate the roof’s surface. Locations subject to concentrated runoff, such as low spots or seams, are more vulnerable.
Recognizing that 90% of all leaks are due to installation negligence or lack of maintenance, the value of frequent inspections becomes more apparent.
Around Chimneys and Flashing
Chimneys and their surrounding flashing are well-known leak culprits. Rusted or poorly sealed galvanized steel flashing will let water through, particularly at angles where the flashing bends. Chimney caps, when damaged or missing, make it easy for rainwater to seed the structure.
Mortar joints around the chimney can wear down over the years, creating openings for water to seep in. Water marks inside of the home, especially around chimneys, usually indicate a leak that requires urgent repair.
Near Plumbing and Roof Vents
This means that plumbing vents and pipes are especially prone to leaks and require close attention. Vent pipes can crack or loosen, vent boots—which are plastic, metal, or a combination—can wear. Damaged seals around vents can lead to leaks, which often manifest as water stains near plumbing fixtures.
Focusing on routine inspections and swift repair work can help stop severe, expensive wreckage.
In Roof Valleys and Joints
Third, roof valleys are areas where two pitches of the roof come together, and they carry a lot of water flow. Accumulated debris can prevent drainage, leading to dangerous pooling that can cause shingle and underlying material rot.
While flashing properly installed can keep water away from vulnerable areas, missing, old, or damaged flashing is a source of leaks, particularly in areas with heavy rainfall.
At Skylights and Wall Junctions
The seals around skylights can wear out over the years, which will cause a leak if not addressed. Flashing installation sometimes around skylights or where walls meet roofs are key areas.
Any water stains on your ceiling or wall near these prone areas should be seen as an immediate red flag.
Diagnose Roof Leaks Accurately
Roof leaks can quickly turn into expensive damage if they’re not accurately diagnosed and repaired. Knowing what’s truly causing the leak is essential in making the most effective repair and ultimately preventing leaks long-term. It is a process that requires thorough patrolling, proven testing procedures, and objective reporting.
Inspect Attic During Daylight
Don’t underestimate the effectiveness of natural light when it comes to identifying roof leaks. Water stains or discoloration on wooden supports or drywall in the attic are strong indicators that moisture has penetrated. Shadows or streaks around roof penetrations such as chimneys or skylights is another indicator that should raise red flags.
Never ignore stained or damp insulation, as this usually indicates current leaks. Taking good notes to capture your observations is key to helping focus subsequent repair approaches as well as possible.
Use a Garden Hose for Testing
Using a simple garden hose, you can quickly confirm or eliminate suspected sources of leaks. Have a second person spray water on the roof, in sections from bottom to top to avoid driving water underneath shingles. From the interior, watch for water intrusion from the likely leak locations.
This process helps to localize the issues at hand, allowing for a more fine-tuned approach to repair planning. Every area that has been impacted needs to be recorded so that it can be addressed later.
Check for Ventilation Issues
Proper attic ventilation keeps moisture from building up in your attic. Without the proper airflow, condensation can form from inside your home, rotting roof structures and damaging shingles in the process. Diagnosing obstructed or inadequate vents accurately is essential.
If added vents are needed, they consider the long term health of the roof, preventing future damage risks.
Document Findings with Photos
Concise, well-structured images of the impacted areas serve as useful visual documentation when submitting claims or tendering for contractors. Organizing photos by the precise location on the building makes retrieval simple when it’s time to make repairs or process claims.
Repairing Roof Leaks: DIY vs. Professional
Figure out whether to repair that pesky roof leak on your own or call in the experts. Consider these factors: First, identify the problem. Repair. Prepare for risks. Consider future gains. Even if you are comfortable repairing minor issues, repairs usually need experience, the right tools, and precision.
Quick Temporary Fixes
Temporary solutions are a solid short-term relief option. Roofing cement can seal small leaks, and tarps can protect open holes and faded shingles from upcoming rains. With small leaks, using duct tape can serve as an effective temporary seal.
These repairs don’t last long. Taking photos and keeping a written record of the leak allows you to measure the damage when getting professional roof repairs in the future.
When to Call a Roofing Expert
If the leak is complex or widespread, like multi-shingle or flashing leaks, it requires professional roofing expertise. Safety should be the top priority, especially when working on roofs that are steep or dangerous.
Hard-to-reach spaces such as valleys or places around chimneys need an expert touch. Chronic leaks, even those filled with DIY fixes, tend to indicate more serious problems that require a professional’s expertise. Quick action, particularly for heavy or active leaks, will save you the greatest amount of damage to your home.
Benefits of Professional Assessment
Experienced roofers, like Pickard Roofing Company with over 90 years of expertise, provide thorough evaluations. They identify root causes, offer comprehensive repair plans, and ensure compliance with regulations.
Many professionals include warranties, giving peace of mind.
Long-Term Cost Savings
Professional hiring avoids repeated patchwork with stopgap measures and prolongs overall durability with permanent solutions. Good quality repairs will include efficient insulation, which reduces energy costs.
At RoofCrafters, we want to stress how much time and energy a professional repair will save you, versus a DIY approach.
Step-by-Step Guide to Basic Repairs
Repairing a roof leak is no different, it just takes tactical thought and steps to create an effective and permanent repair. By following logical steps and using the proper tools, you can diagnose and repair leaks quickly. Always prioritize safety at the top to avoid causing further damage or harm.
Plus, writing down every step is important for documenting repairs and making future maintenance easier.
Replace Damaged Shingles
Use a pry bar and hammer to carefully remove broken or missing shingles to prevent damaging areas that are fully intact. If you need to replace a shingle, you can match it by cutting a small sample from the bottom of an existing tab.
Finally, install the new shingle following the manufacturer’s installation instructions, making sure everything is lined up to help guide water runoff. Finish all edges with roofing cement to make your patch more durable and water resistant.
Seal Cracks Around Chimneys
Start by giving the area around your chimney a good cleaning to ensure proper adhesive adherence. Use premium-quality caulk or roofing cement to fill in cracks and seams, working to create a watertight seal.
Don’t let a leak re-emerge. Regularly check the seal for wear and tear.
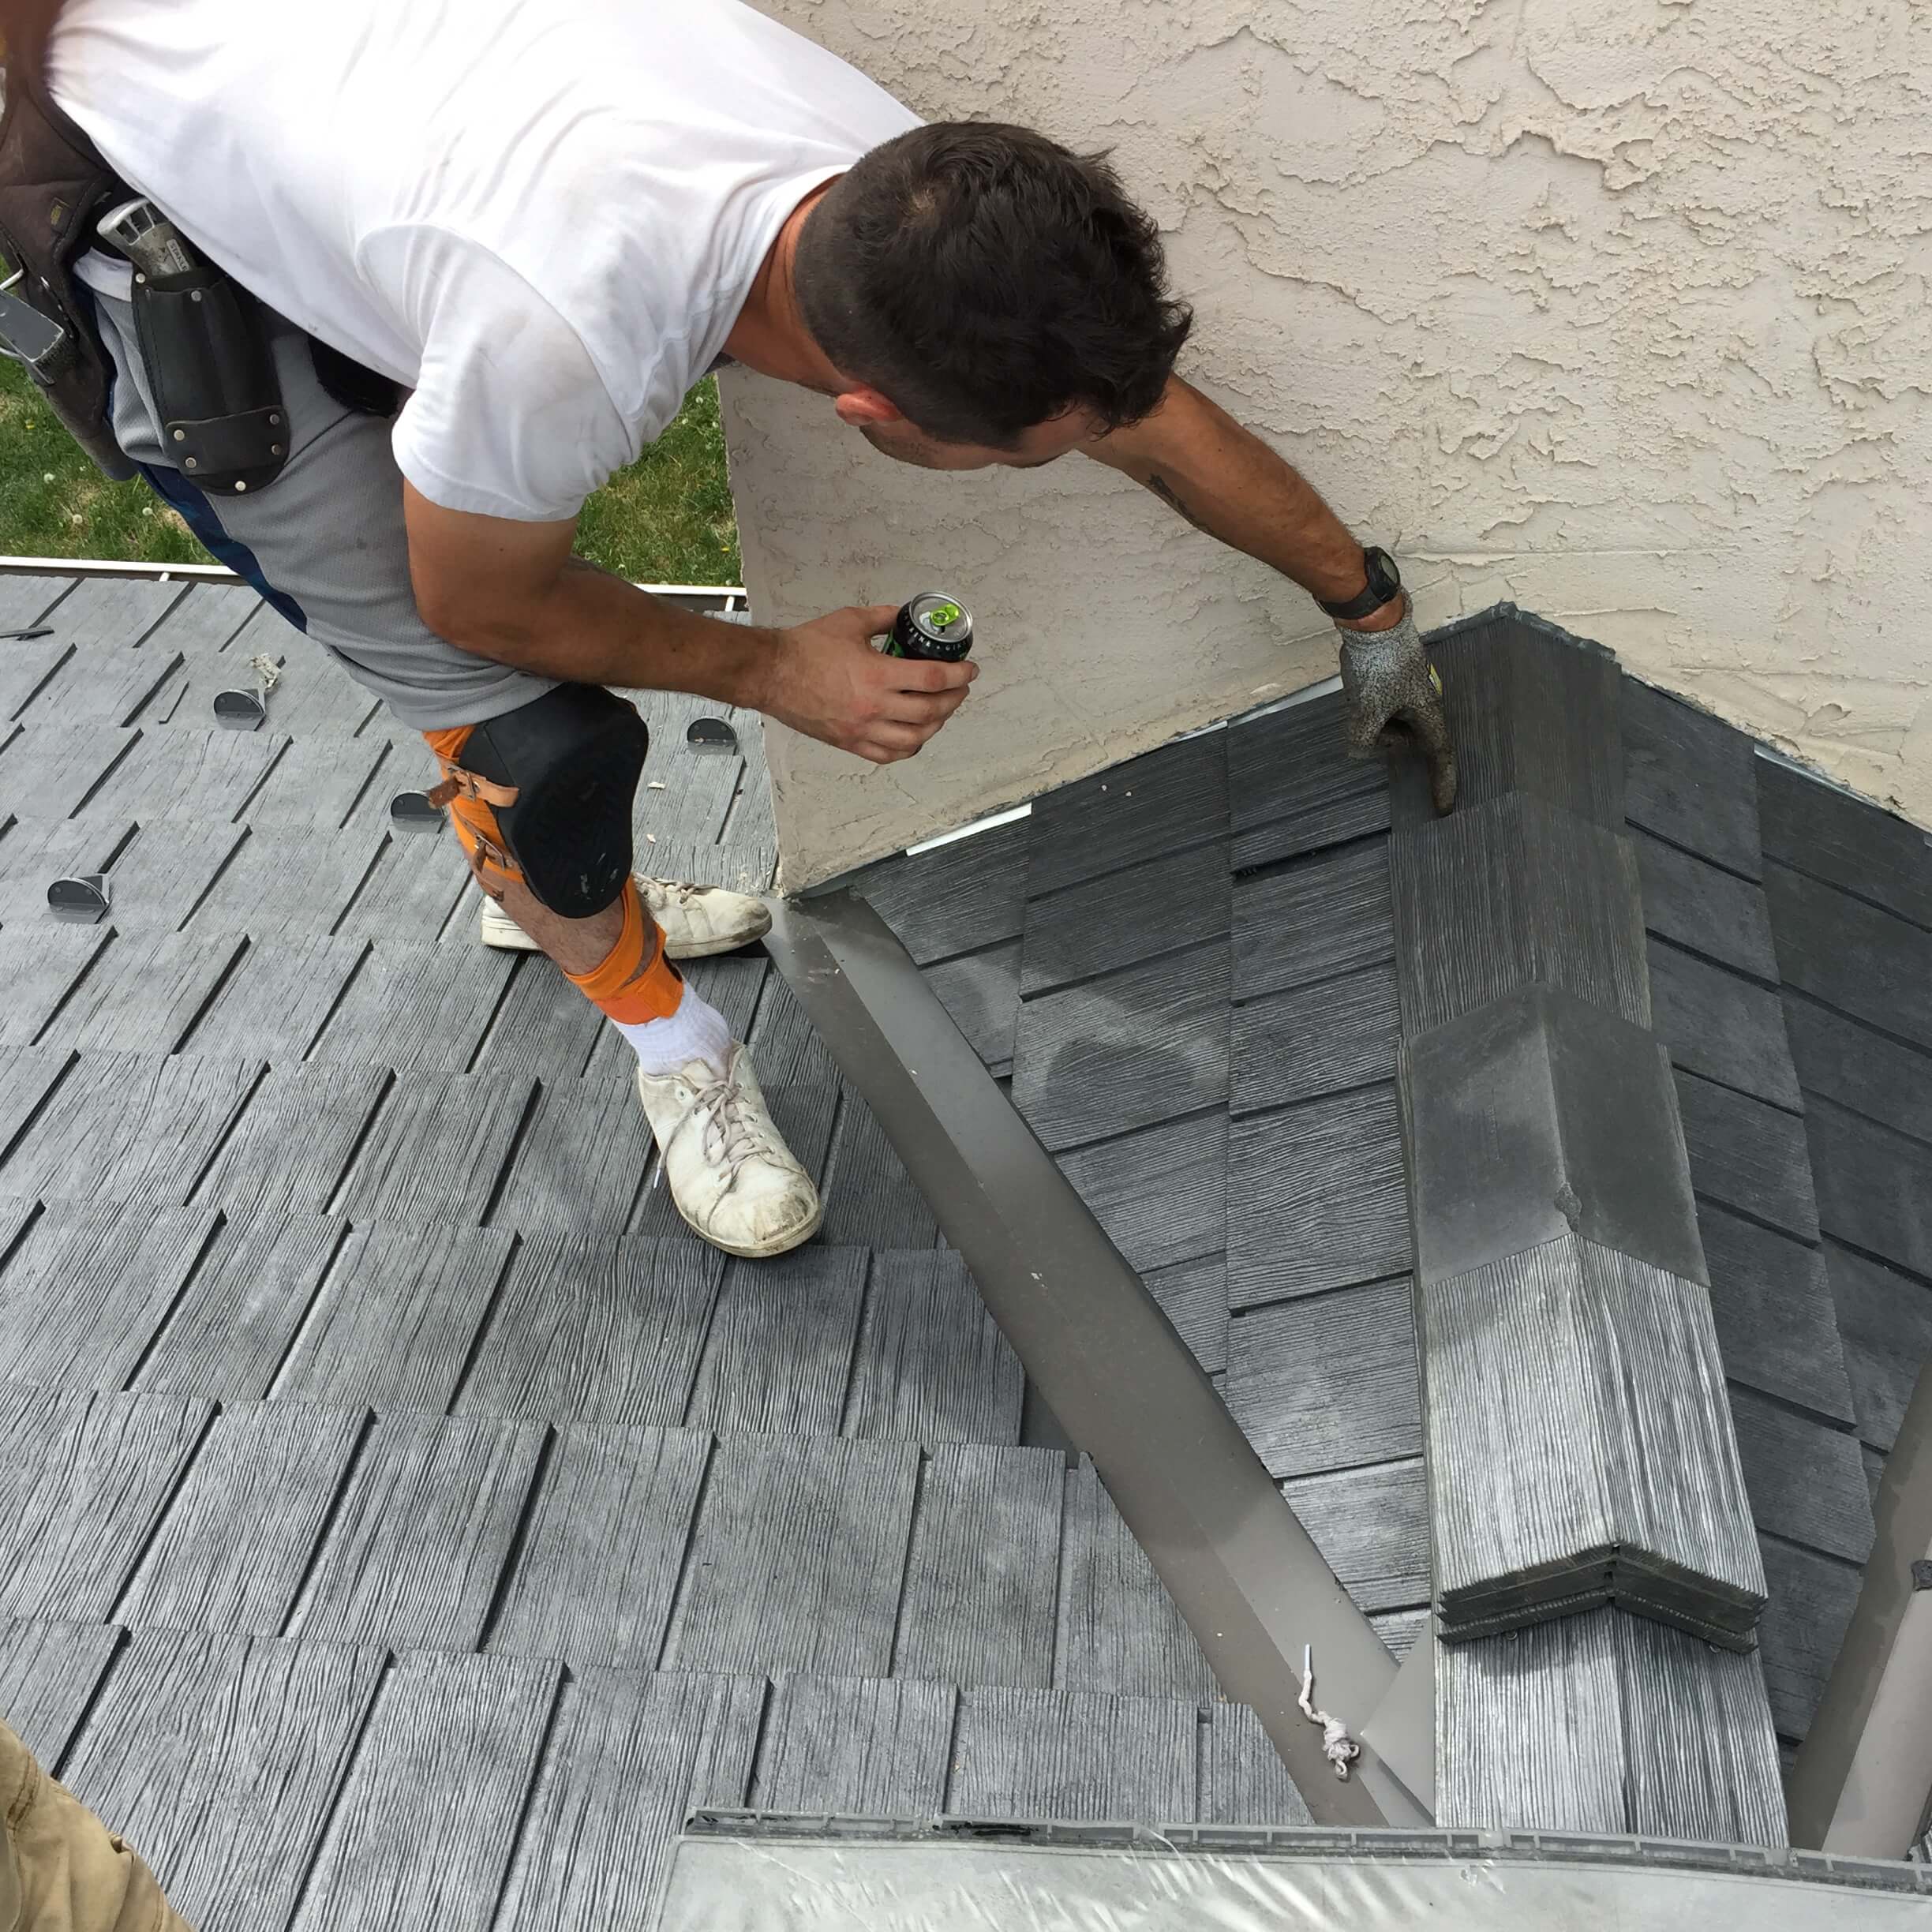
Repair or Replace Flashing
Check your flashing for signs of damage, especially where two sections of roof meet or around chimneys. Slide out and replace old flashing, working with care to seal old edges and overlapping new pieces so that they crisscross and create a waterproof shelter.
Seal the edges down with a good roofing cement to stop any water intrusion.
Address Nail Pops Effectively
Identify nail pops and their extent of damage. To hammer back out-protruding nails or remove them, lift the seal on the shingle and pry up nails carefully.
Once you re-seal the area with roofing cement, check regularly for leaks.
Repairing Pipe Boot Leaks
Check pipe boots, aka storm collar boots, for cracks or other signs of deterioration. Replace broken boots, making sure that the base is sealed tight.
A full pipe collar assembly consists of flashing, a storm collar, a rain cap, as well as the pipe boot itself.
Cost Factors in Roof Leak Repairs
Several factors go into figuring the cost of roof leak repair. These considerations influence the total cost and enable you to budget wisely, avoiding unnecessary expense and ensuring the smartest choices when preparing for your repair.
Size and Location of the Leak
The size and location of a roof leak are the biggest factors affecting repair costs. More extensive leaks will usually necessitate additional materials and labor time, driving up costs.
Repairing extensive, multi-leak damage can get pricey. Add in the price of repairing the interior water damage or mold remediation and the cost climbs between $1,200 to more than $3,000.
High-risk locations, like valleys or spots around chimneys, need extra care, which contributes to the total expenditure. Flashing repairs, which act as a seal for joints on your roof, can cost anywhere between $200 and $500 based on the complexity of the material used.
Type of Roofing Material
Roofing materials have a major effect on repair costs. For example, asphalt shingles — America’s most popular roof covering — usually are the cheapest to repair.
In contrast, slate roofs run an average of $1,550 to fix. Metal roofs, known for durability, may cost about $1,600 on average.
Matching existing materials, particularly for specialty/unique or high-quality roofs, can add even more to the cost. Long-term investments in durable materials can reduce future repair frequency and maintenance.
Complexity of the Repair
Complex in-depth repairs involving several layers of structure or complex damage may need specialized skills from tradesmen or contractors.
Replacing roof deck stiffening can run from $500 to $1,500. Making ice dam repairs will cost you an extra $500 to $1,500, on top of your costs for repairing leaks.
Costs can go up 10% to 15% for emergency repairs or after-hours service, underscoring the need to take action at the first signs of trouble.
Labor Costs and Guarantees
Labor costs depend on local demand, competition, and cost of living. Side by side contractor comparisons provide the most value, with clear warranties including both material and workmanship being extremely important.
Preventative Measures for Roof Leaks
By taking preventative measures to maintain your roof, you will save yourself valuable time, money, and headache in the long run. By implementing regular maintenance and addressing potential issues early, you can extend the life of your roof and reduce the risk of costly repairs.
Here are the primary preventative measures to look at to ensure successful leak prevention.
Regular Roof Inspections
Getting an annual roof inspection done is a proactive measure that’ll ensure you find possible issues before they turn into costly leaks. Inspections are most beneficial before times of severe weather, like the intense heat of the summer or the snow of winter.
During these check-ups, look for signs of wear. Pay particular attention to cracked shingles, loose flashing, and damaged roof valleys, as these are frequent leak culprits. Documenting findings helps track changes over time and plan necessary repairs.
Though DIY inspections are useful, home and business owners can benefit from a professional inspection that promises a complete evaluation, particularly following severe storms.
Clean Gutters and Downspouts
Clogged gutters prevent water from flowing away from your roof, causing it to pool and increasing the risk of leaks. Regularly removing debris, particularly during fall and spring, will help maintain the necessary drainage.
Make sure downspouts lead water at least 3 feet away from the home’s foundation to avoid foundation flooding damage. After some heavy rainfalls, check drainage areas to make sure water is continuing to drain properly.
Trim Overhanging Trees
Low-hanging or overhanging branches can scrape shingles during storms or drop debris that clogs gutters. Keep branches trimmed back, so you have at least a 10-foot buffer between trees and your house, especially your roofline.
Routine health evaluations of trees in the vicinity can avoid surprise hazards as well.
Maintain Proper Attic Ventilation
Keeping your attic well-ventilated helps disperse moisture buildup that could otherwise rot roofing materials. Allowing airflow through more efficient vent installation is crucial.
The second important step in minimizing roof leaks due to condensation is improving airflow across your roof.
Long-Term Impacts of Untreated Leaks
Roof leaks are more than a nuisance. Because they can cause destructive havoc in silence for months or years before any visual indicators arise. Allowing these problems to fester not only cuts your roof’s life expectancy but takes a toll on your home’s structural integrity. Knowing the long-term impacts of untreated leaks will help you protect your investment and ensure comfort for the long haul.
Structural Damage to the Building
Furthermore, untreated leaks can deteriorate the integrity of the building’s structure over time. Water leaking into ceiling and wall cavities can cause visible sagging. This is an obvious and alarming indicator of potentially catastrophic damage.
Beams, supports and other foundational pieces that are subject to added moisture can rot or corrode, resulting in a dangerous loss of load-bearing ability. The impacts on property are significant as well. Wooden beams rot and warp while metal components corrode and rust out.
Documenting these changes provides a better picture of the overall damage and a plan for making repairs. Thus, a professional inspection is really needed to detect those hidden vulnerabilities and make sure she doesn’t start to further deteriorate.
Mold and Mildew Growth
Moisture from untreated leaks can produce an environment rife with mold and mildew that can perpetrate crop loss and property destruction at a rapid pace in dark, moist areas. Typical locations would be in attics, crawlspaces, or behind walls where moisture builds up out of sight.
In addition to all the surface damage, mold releases spores into the air that can greatly reduce air quality. A pungent, moldy smell is usually the first indicator of leaks hiding behind your walls.
Preventing mold formation is key, but in the case of large mold growths, certified mold remediation guarantees complete removal of mold from your home.
Reduced Indoor Air Quality
Untreated leaks can have long-term impacts on your home’s indoor air quality. Moisture promotes the growth of mold, dust mites, and other allergens and irritants that impact the health of vulnerable populations.
Musty odors or moisture lead to decreased comfort, making homes and other spaces less pleasant places to live. Post-repair air purifiers and dehumidifiers will help ensure the air quality is restored while increasing comfort and health.
Increased Energy Bills
Leaks negate the benefits of insulation by allowing heat to seep out in the winter or in during the summer, leading to increased energy consumption. If buildings continue to have such poor insulation efficiency, HVAC systems will need to work much harder.
Keeping a close watch on energy bills for unexplained surges is one way to uncover undetected leaks. When making repairs, incorporating energy-efficient materials like improved insulation can save money in the long run.
Conclusion
Permanent roof leaks can bring serious reroofing disaster, but being proactive makes all the difference. Identifying roof leak repair signs early, understanding major leak causes, and fixing problems promptly will save you time and money. Do smaller repairs yourself or bring in an expert. Staying on top of repairs will not only save your home from nature’s wrath, but it can save you from unnecessary worry. Proper responsible upkeep and prudent protective actions work wonders in ensuring your roof stays intact and leakless.
Your home deserves the best care and attention, and so does your roof. Don’t let minor annoyances fester into major headaches. Avoid the pitfalls and make sure your roof is protecting your investment for years to come. Get started now, and your future self will be grateful!
Frequently Asked Questions
How can I tell if my roof has a leak?
Check for ceilings or walls that have water stains, a musty smell, or visible drips during rain. Look for missing shingles, damaged flashing, or clogged gutters. Taking action at these early warning signs can help avoid the need for costly repairs or roof replacement.
What are the most common causes of roof leaks?
Roof leaks typically occur due to shingles that are missing or damaged, cracked or corroded flashing, debris clogged gutters, or improper installation. Weather can play a big factor in potential leaking, whether it be pounding rain, snow accumulation, or gale force winds.
Can I repair a roof leak myself?
The good news is that some small roof leaks are easy to repair with the right tools and materials. If the damage is widespread or poses a danger, we recommend speaking to an expert so you can make sure it’s repaired correctly and will last.
How much does roof leak repair typically cost?
There are countless factors that go into the cost of roof damage. Depending on the accessibility and size of the roof leak, small roof repairs may be on average CAD $150-$400. The cost will vary based on the extent of damage, type of material, and labor needed.
What happens if I ignore a roof leak?
In the absence of spot-repairing treatments, untreated leaks can result in mold growth, structural damage, and costly repairs. Their damage doesn’t stop there – they reduce energy efficiency and can endanger your home’s safety. Deal with roof leaks quickly to save time, money, and stress.
How can I prevent roof leaks in the future?
Prevent leaks by regularly inspecting your roof, clearing your gutters and sealing areas that are particularly vulnerable to leaks. Replace or repair missing or broken shingles and make sure your attic is properly ventilated to help your roof last longer and minimize potential damages.
When should I call a professional for a roof leak?
Contact a pro when the leak is extensive, difficult to identify, or includes more severe structural harm. Only trained professionals have the tools and expertise to safely and effectively fix your roof leak.
Not what you were looking for? Safe Roofing also offers the following services:
Roof Replacement Roof Repair Roof Ventilation Solar Panel installation Gutter Installation
Safe Roofing’s Certifications and Qualifications
Manufacturer Certification: IKO (preferred installer)
Building Products of Canada Corp.
GAF Certified Roofer
CertainTeed
Euroshield Certified